When you install NetHunt, we already include some sample pipelines and stages for you to see the basics of what your new CRM can do. Need something different? No problem! You can always customize the ones we already created. Here's how to:
Go to Settings - Folder and Field Management - Folder - Stage/Status field

Click on the field and you will see the settings for it, including the stage/status options that are there by default.

When you click on one of these presets, you can change it's name and by clicking on the color icon you can change the color of it.

In order to add another stage/status, just click on "Add Preset" and set one up - you can also edit the name of it right now or later on and change the color.

Don't forget to hit "Done", save the changes and use you new amazing stage/status pipeline!
ℹ️ Please note: Renaming a Status preset in Settings does not automatically rename the Status for records that were already assigned to the original preset.
For example, if you rename “New” to “New STATUS”, records that were already assigned to “New” will still have the old Status. 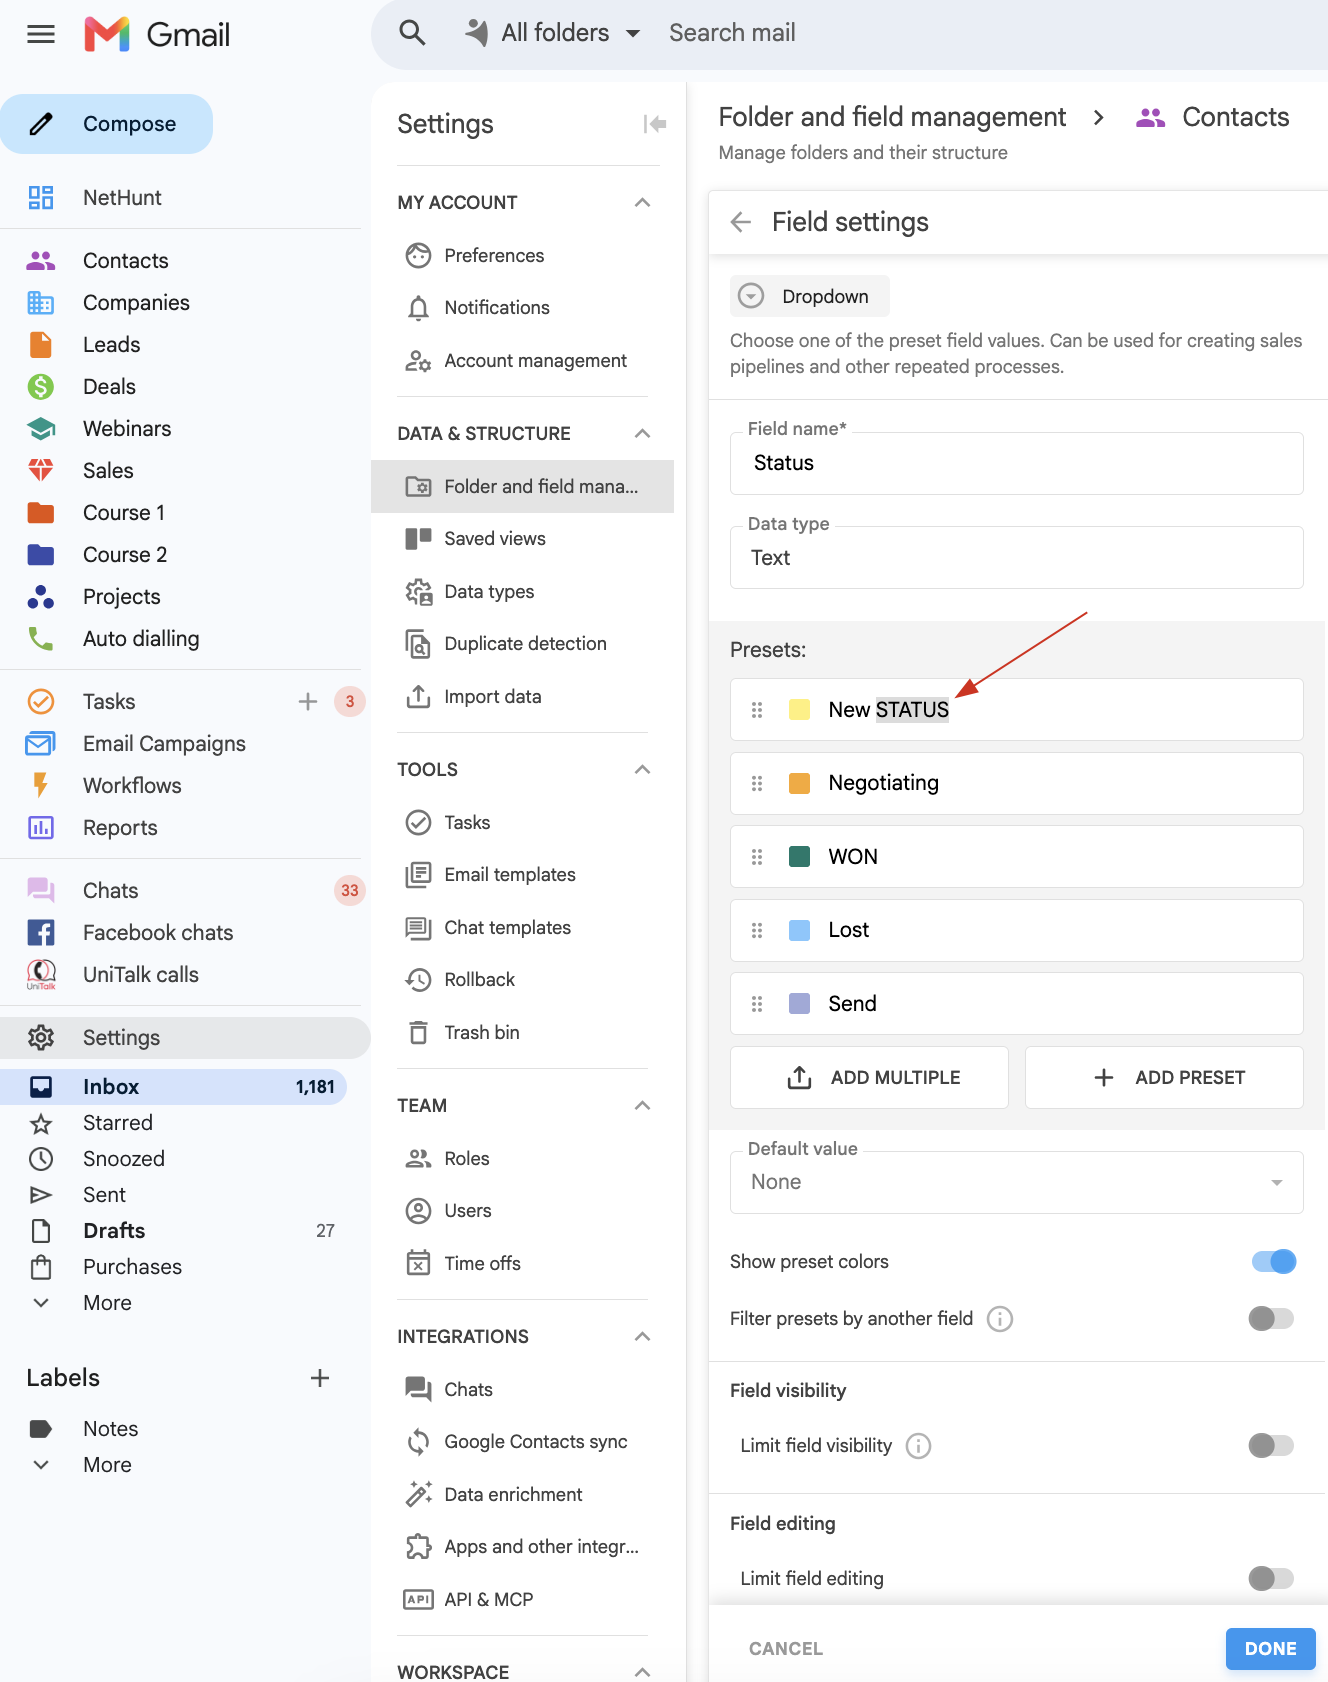
No worries — you can quickly update them in Card View!
To update the Status for these records:
- Go to the appropriate folder.
- Switch to Card View and select the Status field.
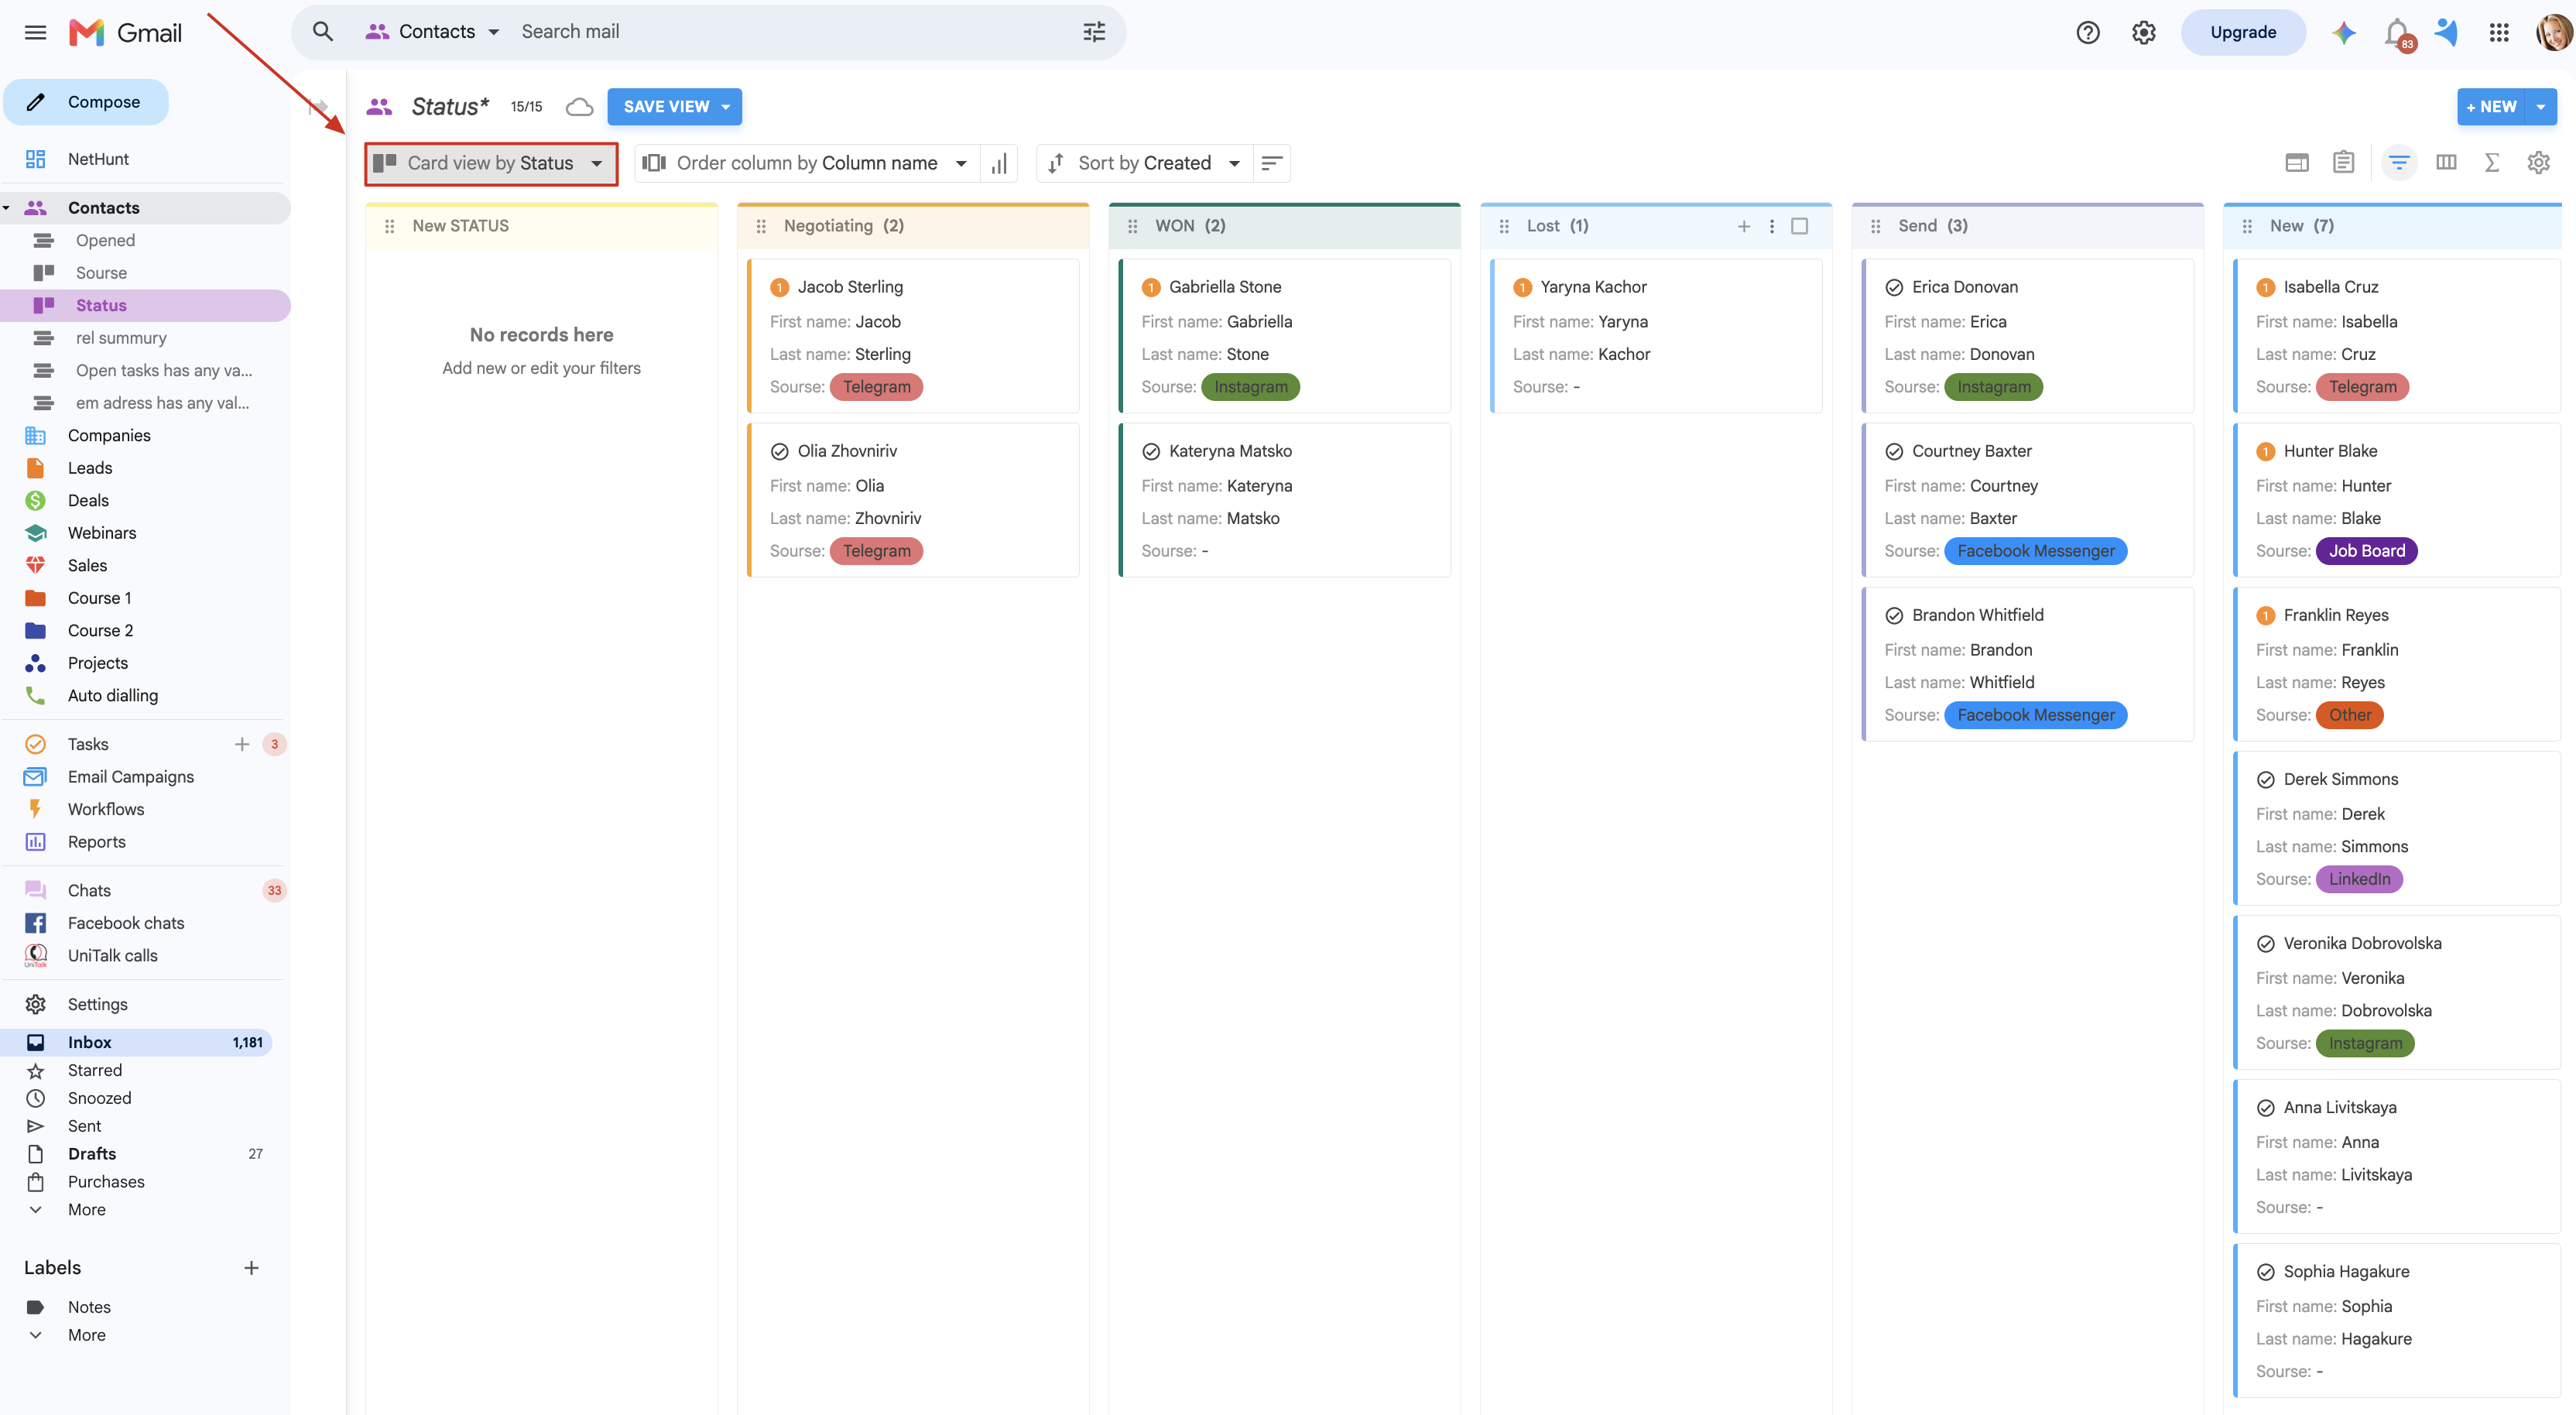
- Find the column with the old “New” Status. (it is usually to the far left)
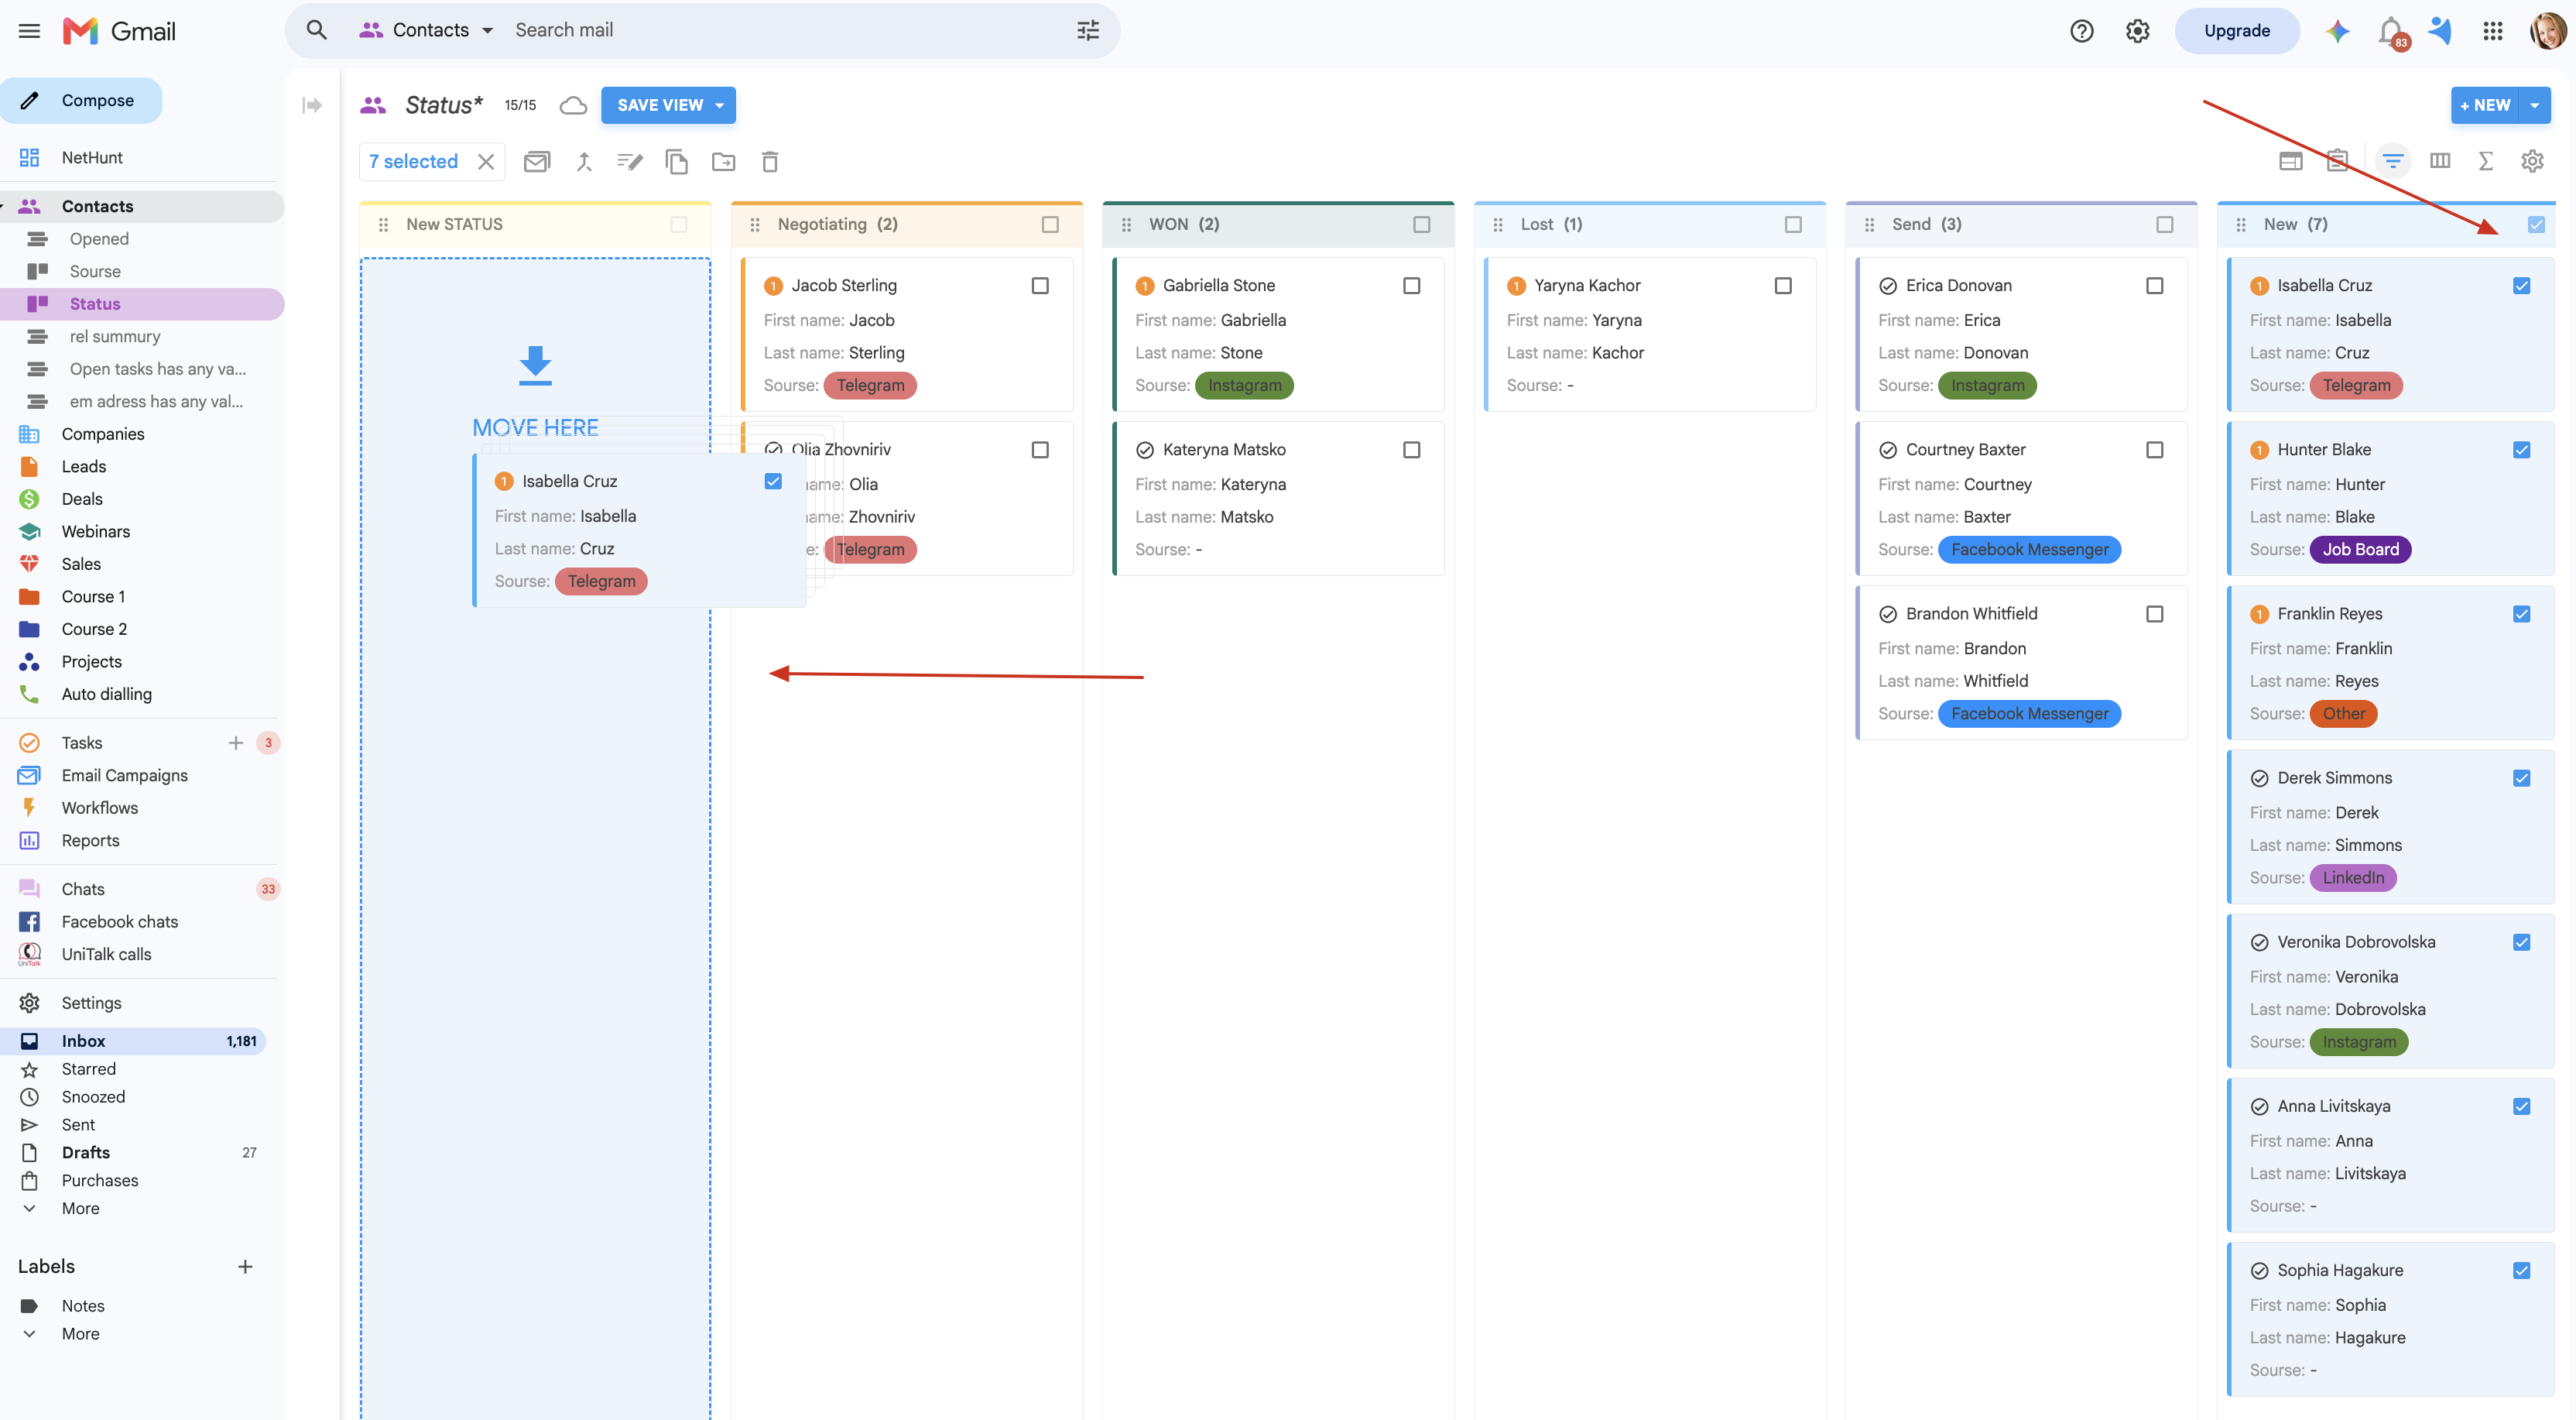
- Select the records that still have the “New” Status.
- Drag and drop the selected records to “New STATUS” or use the Mass update action to mass update their status to the correct one.
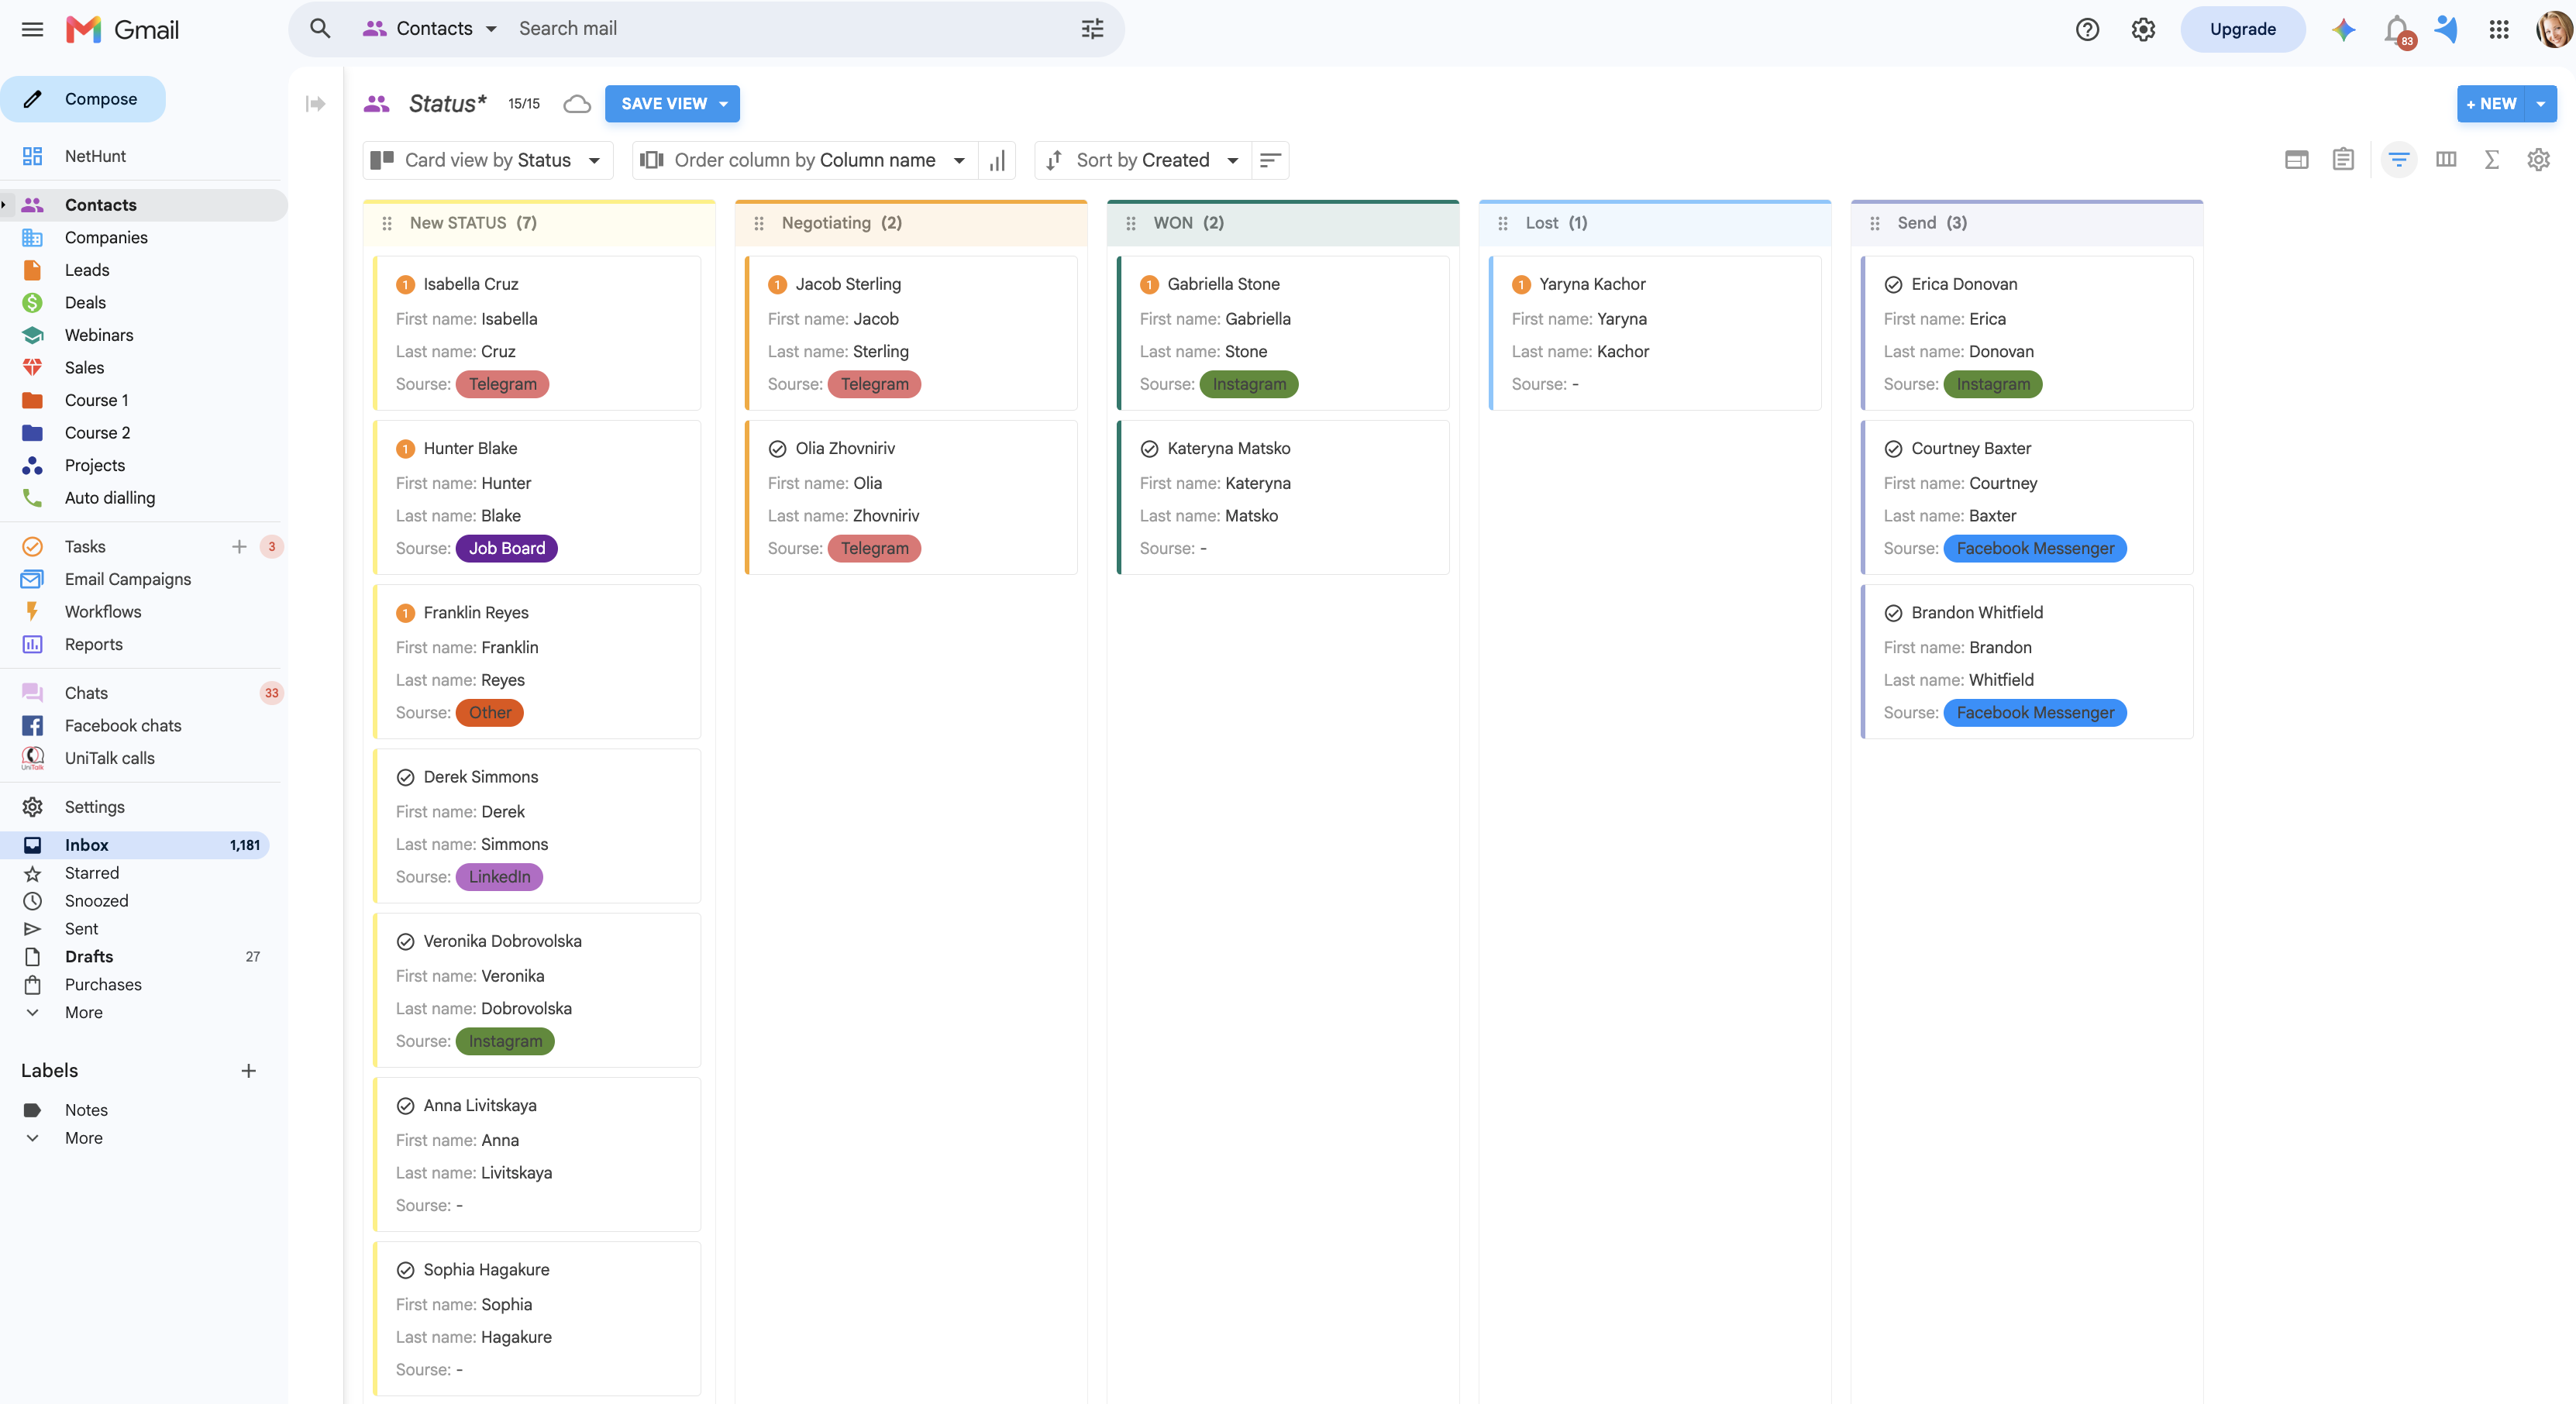
Voilà! All the selected records are now assigned to “New STATUS”.
Good to know: Accidentally deleted a Status preset? No worries! Just create it again with the same name, then open the folder in Card View and move the relevant records to the newly created column.
And you're back on track! Your records will now be assigned to the restored Status.
Haven’t found the answers you’re looking for? Ask our Users Community.
